



Costa Rica All-on-4 Dental Implants: Your Day-by-Day Recovery Roadmap to a New Smile (2026 Guide)
 Medically Reviewed & Updated for 2026
You’ve made the smartest financial decision of your life by choosing Costa Rica for your All-on-4 dental implants.
But let’s be honest: the moment you hit “book flight,” the questions start flooding your brain. “How long until I can eat a steak?
We get it. The number one fear holding people back from life-changing dental tourism isn’t the cost or the travel, it’s the fear of the unknown recovery.
This guide is your 2026 playbook. We are ripping the curtain back on the Costa Rica all-on-4 recovery process, giving you a brutal (but beautiful), honest day-by-day breakdown.
From the moment you sit in the chair to your 6-month follow-up, we’re telling you exactly what to expect, how to manage the healing, and how to ensure your trip is a vacation and a medical success.
Ready to trade anxiety for an action plan? Let’s build that smile.
🗓️ Before You Even Board That Plane: Pre-Treatment Timeline

Weeks 6-8 Before Surgery: The Planning Phase
Your Costa Rica all on 4 recovery actually starts long before you touch down in San José. Smart patients begin prep work 6-8 weeks out. Here’s what that looks like:
Get your health squared away. Schedule a full physical with your doctor back home. Certain conditions (uncontrolled diabetes, recent heart issues, or active infections) can throw a wrench in your plans. Better to know now than at the clinic.
Stock your recovery kit. Order soft food supplies, ice packs, and those fancy neck pillows for the flight home. Trust us – future you will send thanks.
Clear your calendar. Block out at least 10-14 days post-surgery. Yes, some people bounce back faster, but padding your schedule beats scrambling to reschedule client meetings from a hotel room in Costa Rica.
2 Weeks Before: Final Countdown
Time to get serious about preparation. Stop smoking (if you haven’t already), cut back on alcohol, and start taking any supplements your dental team recommended.
Many clinics suggest starting vitamin C and calcium supplements to support healing timeline optimization.
Book your accommodations strategically. Pick a hotel within 15 minutes of the clinic. You won’t want long commutes during early recovery.
Request a room with a small fridge for storing soft foods and cold packs.
✈️ Day -1 to Day 0: Arrival & Surgery Day

Arrival Day: Getting Settled
Most patients fly in the day before surgery. Smart move. This gives you time to adjust to the timezone, meet your surgical team, and do final prep work without rushing from the airport.
Your pre-op consultation typically happens this day. Your surgeon reviews CT scans, confirms the treatment plan, and walks through post-op instructions.
This is your chance to ask every question bouncing around in your head. No question is too small or too “dumb.”
Sleep is your secret weapon. Get to bed early. Your body needs rest before the big day.
Surgery Day: The Main Event
Here’s what your dental implant recovery timeline, Day Zero, looks like:
Morning: Arrive at the clinic fasting (typically nothing to eat or drink after midnight). You’ll change into surgical attire and meet the anesthesia team.
During Surgery (3-4 hours): With sedation, you’ll be comfortably asleep while the surgical team works their magic.
The all-on-4 technique places four strategically angled implants per arch, then attaches temporary teeth the same day. Yes, you walk out with teeth – that’s the beauty of this approach.
Immediate Post-Op (1-2 hours): You’ll wake up in recovery. Expect grogginess, some facial swelling, and that weird numb feeling from the local anesthetic. The nursing team monitors you closely before discharge.
Back to the Hotel: Your companion (you did bring someone, right?) helps you settle in. Ice packs become your best friend. Apply them 20 minutes on, 20 minutes off for the first 24 hours.
📅 Days 1-3: The Challenging Phase (But You’ve Got This)

Day 1: Expect the Worst Day
Let’s not sugarcoat it – Day 1 typically brings peak swelling and discomfort. Your face might look like you went a few rounds with Mike Tyson. Completely normal.
Pain Management Protocol:
- Take prescribed medications exactly on schedule (don’t wait for pain to spike)
- Keep your head elevated even while sleeping
- Continue aggressive icing
- Drink plenty of fluids through a straw (unless instructed otherwise)
Food Strategy: Think protein shakes, smoothies, and broths. Calories matter during healing, so don’t skip meals even if you’re not hungry. Room-temperature is your friend – nothing too hot or too cold.
Activity Level: Couch potato mode activated. Binge that Netflix series. Read that book. Absolutely no strenuous activity. Even bending over to tie shoes can increase facial swelling.
Day 2-3: Turning the Corner
Most patients report Day 2 as slightly better than Day 1. The swelling might still be impressive, but the acute pain typically starts backing off if you’ve stayed on top of medications.
Your clinic follow-up usually happens on Day 2 or 3. The surgical team checks your implants, removes any stitches if needed, and confirms you’re healing on track. This appointment is mandatory – don’t skip it to go ziplining (seriously, we’ve heard the excuses).
Gentle oral hygiene starts now. Your clinic provides special rinses and shows you how to clean around the temporary teeth without disturbing the surgical sites.
🌴 Days 4-7: The Tourism Sweet Spot

Day 4-5: Feeling Human Again
Here’s where Costa Rica all-on-4 patients start enjoying their trip. Swelling typically drops by 50-60%, and discomfort becomes manageable with over-the-counter pain relievers.
What you CAN do:
- Light sightseeing (botanical gardens, gentle nature walks)
- Enjoy meals at restaurants (stick to soft foods though)
- Take photos showing off that new smile
- Short car trips to nearby attractions
What you CANNOT do:
- Surf lessons or whitewater rafting
- Long, bumpy vehicle rides
- Anything requiring dental impressions or heavy chewing
- Drinking through regular straws can create suction that disturbs healing.
Day 6-7: Pre-Departure Prep
- Your final clinic check-up happens before you fly home. The team confirms:
- Implants are integrating properly
- No signs of infection
- Temporary teeth are functioning correctly
- You have all the necessary medications and instructions for home care
Flight prep is critical. Pack extra ice packs in your carry-on. Bring soft snacks. Request an aisle seat for easy bathroom access and movement. The cabin pressure won’t affect your implants, but staying hydrated and moving periodically helps with overall comfort.
🏠 Week 2-4: Home Recovery & Settling In

Week 2: Back to Reality
By now, you’re back in your routine, with modifications. Most patients return to desk jobs during Week 2, though you might still look slightly puffy in video calls. Camera off? No judgment here.
Dietary progression: Start introducing slightly firmer soft foods. Scrambled eggs, well-cooked pasta, mashed vegetables. Your jaw muscles need gradual conditioning, but forcing hard foods is a rookie mistake that can stress the implants.
Oral hygiene becomes routine. You’ll use special brushes and rinses around the temporary teeth. Set phone reminders if needed – consistency matters more than you’d think for healing timeline success.
Week 3-4: The New Normal
Swelling? Gone. Discomfort? Minimal to none. You’re adjusting to speaking and eating with the temporary teeth.
Common Week 3-4 experiences:
- Speaking feels more natural (early days can involve some lisping)
- Eating soft foods becomes effortless
- You stop thinking about the implants every five minutes
- Friends and family start commenting on your smile
Virtual check-ins with your Costa Rica team typically happen now. Send photos, report any concerns, and get reassurance that you’re healing beautifully. This remote support is why choosing an experienced clinic matters.
📊 Month 2-3: Osseointegration in Action
 Here’s where the magic happens beneath your gums. Osseointegration – fancy term for bone growing around and fusing with the titanium implants – kicks into high gear.
What you’re experiencing:
- Temporary teeth feel more stable
- You can gradually expand your diet (still avoiding really hard/crunchy foods)
- Normal activities resume completely
- The implants become “part of you.”
Typical diet at this stage: Most foods are back on the menu. Tender meats, most vegetables, softer breads. We’re still holding off on things like raw carrots, hard nuts, or tough steaks.
Watch for warning signs (rare, but good to know):
- Persistent pain or swelling
- Loose temporary teeth
- Bad taste or odor that doesn’t improve with cleaning
- Fever or general unwellness
Any of these? Contact your clinic immediately. They can guide you remotely or connect you with a trusted local provider if needed.
🎯 Month 4-6: Final Restoration & Long-Term Success

The Four-Month Mark: Return to Paradise
Most Costa Rica all-on-4 patients schedule their final restoration trip around Month 4-6. This is when you swap those temporary teeth for the permanent, custom-crafted beauties.
This trip is shorter – typically 3-5 days. The clinic takes new impressions, fabricates your final prosthetics, and makes sure everything fits perfectly. Think of it as the victory lap.
What makes this trip different:
- You already know the clinic and staff
- No recovery needed (just adjustments and fitting)
- You can fully enjoy Costa Rica’s attractions
- You’re showing off your smile instead of hiding it
The Permanent Restoration Process
Your surgical team removes the temporary teeth (quick and painless), makes final impressions, and crafts the permanent prosthetics using advanced materials that look incredibly natural and function brilliantly.
Color matching gets obsessive (in a good way). The lab technician considers your skin tone, remaining natural teeth if you only did one arch, and your personal preferences for that Hollywood white versus natural look.
Final fitting day feels like Christmas morning. The permanent teeth click into place, and you see the final result – the smile you’ve been working toward for months.
🏥 Why Flikier Dental Institute Sets the Standard
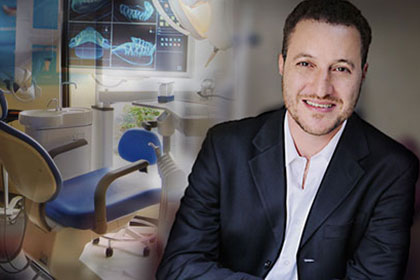 When you’re trusting someone with your smile transformation, you want the absolute best. Flikier Dental Institute has become the gold standard for Costa Rica dental implants, and here’s why smart patients choose us:
Technology That Actually Matters: We use 3D cone beam CT scanning for surgical planning so precise, it’s almost unfair.
Our digital workflow means your temporary and permanent teeth fit better, faster, and more comfortably than traditional methods. We’re talking same-day teeth that actually work, not just look good.
The Surgeon Factor: Our team includes specialists with thousands of all-on-4 procedures under their belts.
This isn’t their side hustle – it’s their entire professional focus. That experience translates to shorter surgery times, fewer complications, and better long-term results.
The Tourism Experience: We get it, you’re combining a major dental procedure with international travel.
Our patient coordinators can handle everything from airport pickup to hotel recommendations to coordinating that final restoration trip months later. You focus on healing and enjoying Costa Rica; we handle the logistics.
Transparent Pricing: No surprise bills. No hidden fees. The quote you get upfront is what you pay. We even break down how much you’re saving versus U.S. or Canadian prices (typically 50-60% less for identical quality).
Lifetime Support: Your relationship with us doesn’t end when you board that flight home. We provide ongoing virtual check-ins, connect you with trusted providers in your home country if emergency care is needed, and remain available for questions years down the line.
Real Patient Results: Check our before-and-after gallery (seriously, the transformations will blow your mind).
Read reviews from patients worldwide. Watch video testimonials of people who came to us nervous and left confident.
The proof isn’t in our marketing, it’s in our patients’ smiles.
💡 Pro Tips for International Patients

Travel Timing Strategy
Book flights with flexibility. Purchase refundable tickets or travel insurance that covers dental complications. While rare, delayed healing might require extending your stay.
Consider the “extended stay” approach. Some patients book 2-3 weeks in Costa Rica, splitting time between the clinic area and beach destinations. This reduces the stress of rushing recovery.
Companion Considerations
Bring someone. Seriously. You’ll need help with transportation, meal prep, and just general support during the first few days. Plus, they get a Costa Rica vacation.
Their role is bigger than you think: Medication reminders, ice pack duty, advocating with medical staff if you’re too groggy, and taking those “new smile” photos once you’re feeling better.
Financial Planning
All-on-4 costs in Costa Rica typically run $12,000-$15,000 per arch compared to $25,000-$40,000+ in the U.S. or Canada. That gap covers your flights and accommodation and still leaves money in your pocket.
Payment timing: Most clinics require a deposit upfront (25-50%) and the balance before surgery. Some offer payment plans for the deposit portion.
Communication Setup
Get a local SIM card or international phone plan. You’ll need reliable communication with your clinic and folks back home.
Learn basic Spanish phrases. While most dental staff speak English, knowing “pain,” “help,” and “thank you” in Spanish helps outside the clinic.
⚠️ Red Flags & When to Worry
 Your body is remarkably good at healing, but sometimes things go sideways. Know when to call your clinic:
Immediate contact situations:
- Severe bleeding that doesn’t stop with gentle pressure
- Fever over 101°F (38.3°C) that persists
- Extreme pain not controlled by prescribed medications
- Difficulty breathing or swallowing
- Signs of allergic reaction
Next-day contact situations:
- Increasing swelling after Day 3
- Persistent bad taste despite proper cleaning
- Numbness that doesn’t gradually improve
- Temporary teeth feeling loose or uncomfortable
Most concerns are easily addressed remotely. Your clinic team has seen it all and can guide you through almost any situation.
🌟 The Six-Month Reality Check
Six months post-surgery, you’re living life with your permanent smile. What does that actually look like?
You’ve forgotten they’re implants. That’s the best compliment. You’re eating normally, smiling confidently, and not giving your teeth a second thought.
Maintenance is minimal. Brush and floss (yes, you still floss around implants). See your local dentist for cleanings. Schedule an annual check-up with your Costa Rica team via video or plan a “dental vacation” for in-person follow-ups.
Your investment paid off. Compare your total cost (procedure + travel + time off) to what you’d have paid locally. Most patients save $15,000-$30,000 while getting world-class care and a memorable experience.
🎬 Your Next Move
 Ready to start your smile transformation? Here’s your action plan:
Step 1: Schedule a virtual consultation with a reputable Costa Rica clinic (like Flikier Dental Institute – we’re biased, but we’re also really good at this).
Step 2: Get your CT scans done locally. Most dental offices can provide these, which you’ll send to your Costa Rica team for evaluation.
Step 3: Receive your customized treatment plan and cost breakdown. Ask every question. A good clinic welcomes them.
Step 4: Book your trip once you’ve committed to the timeline. Give yourself 2-3 months to plan properly.
Step 5: Follow pre-op instructions to the letter. This sets up your healing timeline for success.
The Costa Rica all-on-4 recovery journey isn’t just about new teeth; it’s about investing in yourself, combining world-class dental care with an unforgettable experience, and walking away with confidence that changes how you interact with the world.
Your smile transformation starts with a single conversation. Make it happen.
Ready to explore your options for Costa Rica dental implants?
Contact Flikier Dental Institute today for a personalized consultation and discover why patients worldwide trust us for their all-on-4 dental implant treatments.
 Or Call Toll Free 1-866-638-1102


 If your file is bigger than 20 Megs you can use our Dropbox account.
